

The Parts of a Book Binder
The Parts of a Book Binder
Let’s take a look inside . . .
Yesterday, I shared a little video flip through of my Book Binder. If you missed that, you can see it here.
Today, I wanted to slow that down a little and talk to you about what a Book Binder is and what’s inside.
A Book Binder is a planning tool. A portable plot board and a space for holding all of your notes as you write your novel. Which is good, because a novel is a BIG thing and having everything you need and all your thoughts gathered in one space is a game changer.
Also, I really think that there’s something to the idea that if you create something that’s visually appealing to you and that excites you to use, you’re more likely to actually use it. And if you use your Book Binder, you’ll actually write your book.
The Parts of a Book Binder
A Book Binder is just a regular 3-ring notebook—in the US it’s letter-size. In other countries, it might be called A4.
In mine, I use five tabs:
The Plot Board
H2DSI (How to Test and Develop a Story Idea)
Plot Points
Zero Draft
Notes
FRED
And in the front of the binder, I keep images.
I like pretty things and I know for sure that I’m more likely to actually use my binder if I enjoy the way it looks and feels.
I went to a thrift store and got a book that had full-page images I really liked that were printed on thick paper. It cost $3. I know that some of you might not like the idea of taking pages out of a book, but it never bothers me. I used those pages in the Plot Board and Images sections of my binder.
You could use scrapbook paper, card stock, or really any paper that appeals to you. You’ll want some sturdier paper to tape your images to and to back your plot board page protectors and give them some stability.
For me, each book gets its own binder. I often have more than one story going at a time. I’m not always writing on all of them, but having a Book Binder for each of them means that when I have ideas or just feel like working on any other in particular, I’m ready to go.
Creating a Book Binder signals to my brain that this novel is ready to move forward, when I’m ready to do it.
Let’s go over each of the parts.
The Plot Board
Novels are divided easily into four parts: Act I, ActII-a, Act II-b, and Act III. And if we divide each of those in half, we get eight sequences.
To put a plot board into my Book Binder, I inserted four page protectors. I just slipped a paper I liked into each one, to give it some stability and make it look nice. The paper itself, I divided in half and labeled with the sequence number.
I wrote my scene notes on sticky notes and placed them in the right sequence.
I also folded another paper in half and stapled it over the bottom, so that there’s a flap on either side. That way, if I lose any sticky notes, they get caught.
Here’s s an image of my Act II-a and Act II-b pages. The papers folded over the bottom fold down, like flaps.
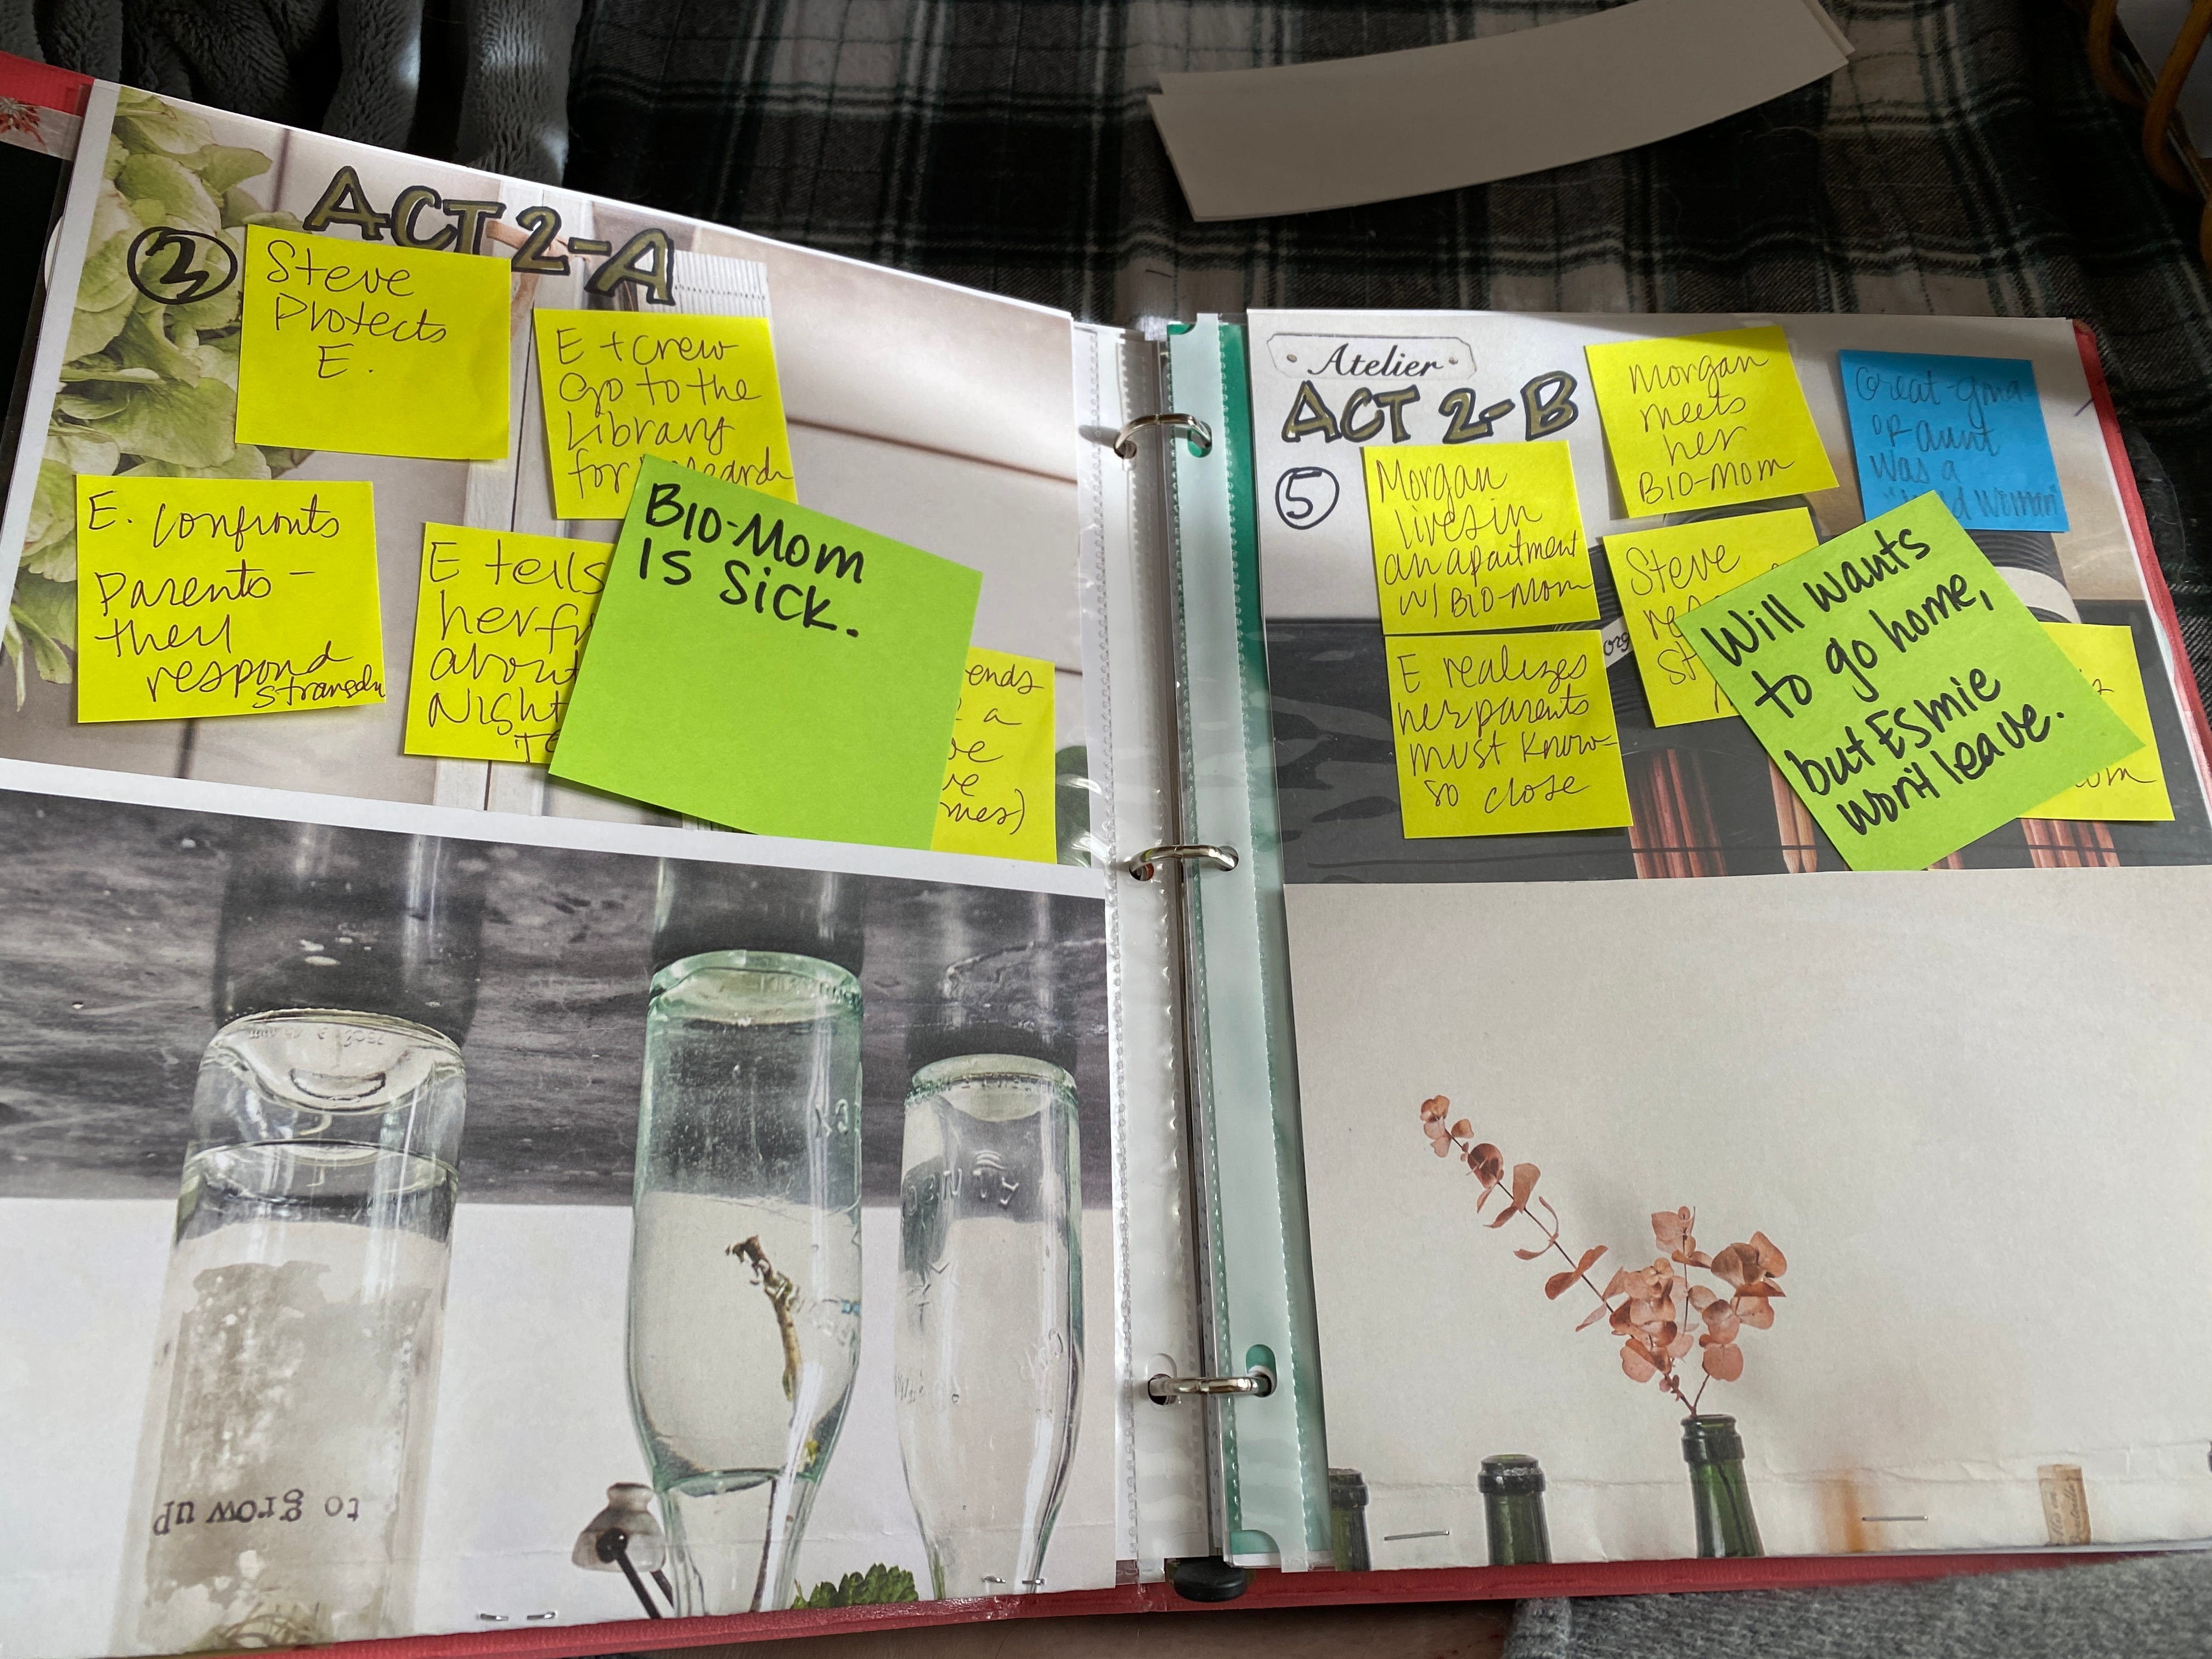
Two of these sheets covers the entire 3-act, 8-sequence structure of my novel.
H2DSI
The H2DSI, or How to Develop and Test a Story Idea section of my binder holds my notes as I plan my characters, settings, and plot points.
I just fill out the H2DSI worksheets, print them out, and put them behind this tab. If I have stuff to add, I do it with a pen.
If you’ve never taken our H2DSI class, it’s free and you can sign up here.
Plot Points
Even though the 5 Key Plot Points are part of H2DSI, I like to have them behind their own tab. They’re that important to my process. These five scenes are the roadmap markers for my whole novel.
Zero Draft
Part of my own plotting process is writing a quick zero draft. It’s usually no more than four or five pages for a middle grade novel. Maybe eight to ten for a young adult or adult story. Basically, I just tell myself the story.
I print that off and put it behind the Zero Draft tab.
Notes
This is pretty self-explanatory. Just some notepaper for notes. I sometimes write What If questions down, hand write if I need to mix things up, or just brainstorm.
Images
I don’t have a tab for images, because I keep them at the front of the binder, ahead of all the tabs. I’m going to talk more tomorrow about how I find images and choose the ones I want. But once I’ve done that, I just put some pretty paper in the front of my binder and tape the images to it.
FRED
FRED is the Folder for Reaching the End of Your Draft. It’s basically a calendar where you can give yourself a star if you write for ten minutes a day on your project, and a log to keep track of your writing progress.
Because I don’t usually only work on one project at a time, but I do only keep one FRED, I don’t keep my FRED in my Book Binder. You could, though. Or at least a log of your work on this one project.
That’s it. I’ll see you tomorrow (Thanksgiving if you’re in the US!) with some more info about how I choose images and where I find them, etc.
Make sure to subscribe if you don’t want to miss that.
Love,
Shaunta
This could morph into a series bible for series writers! thanks for the close-up!