

Images For Your Book Binder
Images For Your Book Binder
The visual heart of your story.
So far, you’ve seen a flip through of my Book Binder and I’ve gone over the parts with you.
Today, I want to talk about the images that make up the heart of your story.
Several years ago, I went to a writer’s conference where Walter Dean Myers was the speaker. (Here’s my favorite of his books.) He talked about his ‘pre-writing’ process during the conference, which included creating a collection of images that represented his story to him.
I loved that idea. I’m not a very visual person. In fact, I’m pretty spectacularly non-visual. I don’t even dream in images. I can’t close my eyes and pull up an image of someone I love, much less someone who isn’t even real.
So having actual images that I can touch and see whenever I want to? Perfect.
Here’s what I look for in images for a story.
When I’m working on developing an idea, I start at Pinterest. I make a board and just let my brain relax and I find photos that represent the characters, settings, and situations that populate the story.
I just start adding images. I don’t worry about organizing them. I don’t worry about being perfect or getting it ‘just right.’ It’s easy to go in later and refine my collection.
Here’s a little more about the images that I look for.
Characters
I start with my main character. Sometimes I choose a celebrity that I think resembles them. Sometimes, I just have a type in mind and I find several photos that represent that even though it’s different people in the pictures.
Settings
I do the same thing with the settings. I think about countries, towns, houses. Other buildings. The natural landscape. I just let my imagination go. Again, it’s more about the feeling of the settings than the exact setting.
Situations
Lastly, I look for images that reflect the situations that make up my story. The elements that I know about, in the early stages.
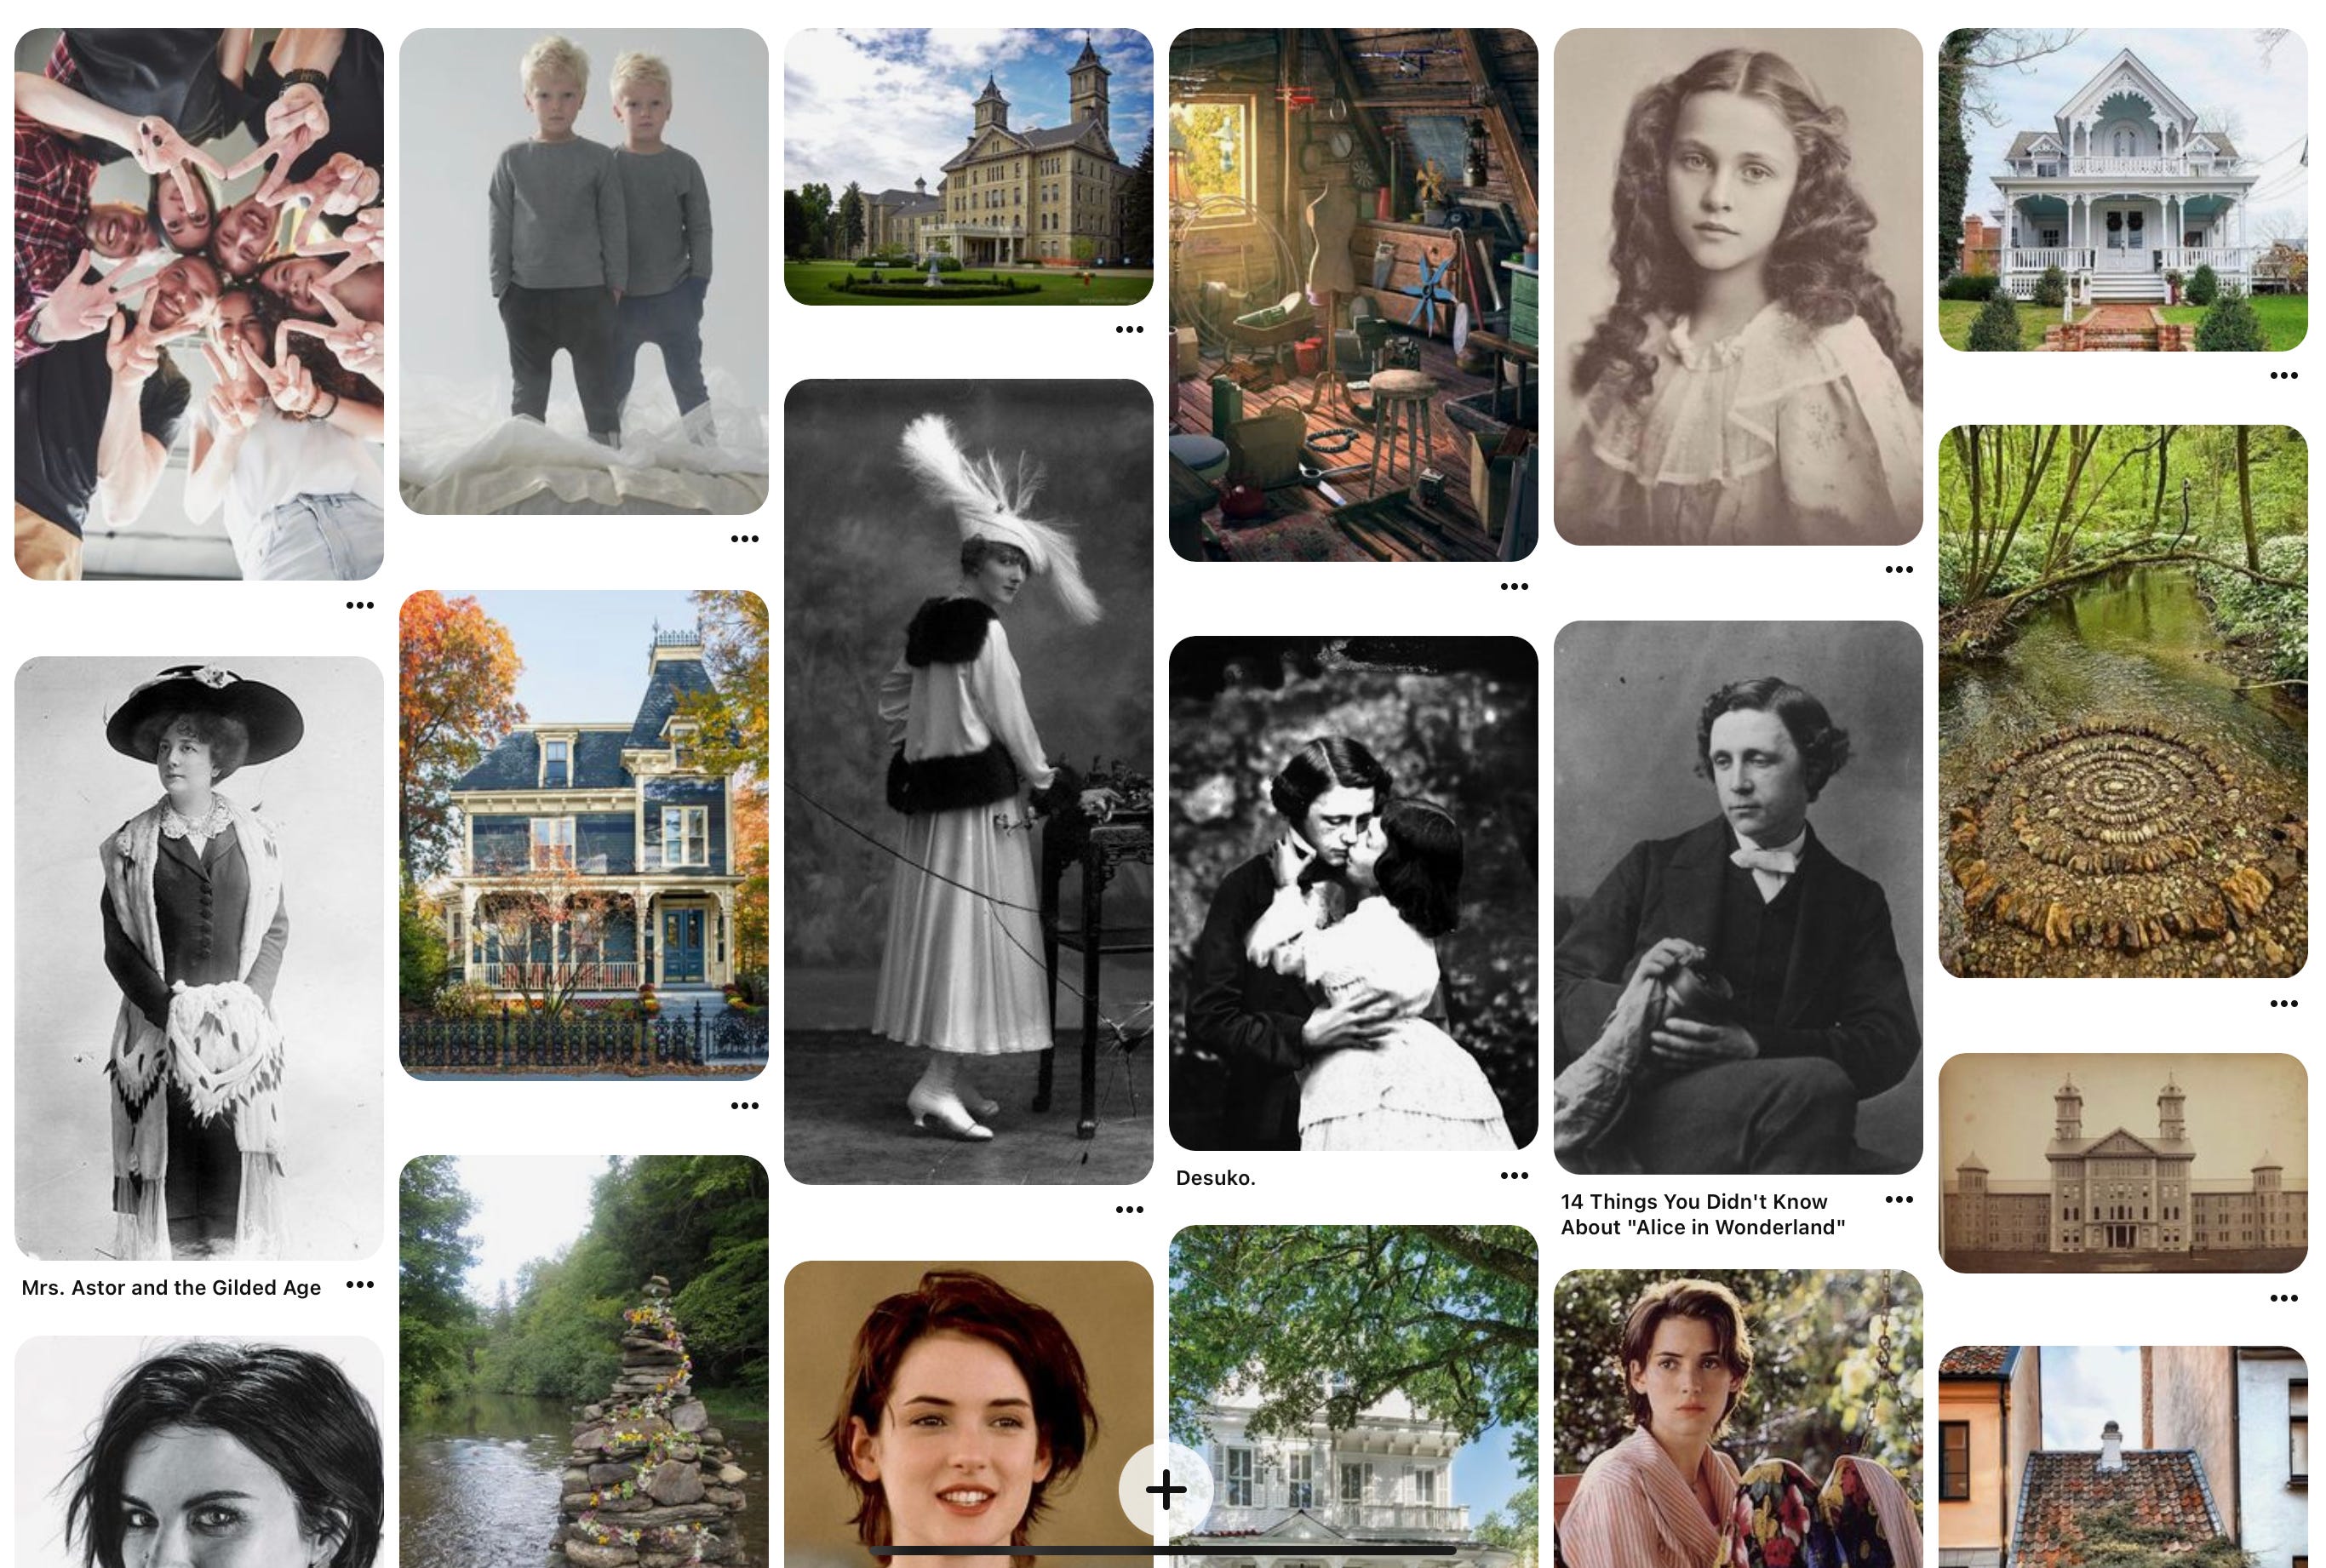
Here’s a screenshot of one of my Pinterest boards.
A Little Bit More
I’m not necessarily looking for the exact person, place, or thing. I want photos that bring the character to my mind, to help me as I’m writing.
Once I have my photos chosen, I send them to be printed. I use Wal-Mart, but there are other one-hour photo processors. Walgreens and CVS both often have photo centers. You can also order photo prints online to be delivered to you.
Because I’m not using my photos commercially—just for myself—and they’ve all been posted for public consumption on Pinterest, I feel good about printing them. I’m not a lawyer though and if you’re concerned, you might want to keep your images to Pinterest.
I have a box full of prints of images that I just like a lot. Sometimes I don’t know how I’ll use them in a story, I just know that I’d like to some day. When I’m starting a new story, I often look through those to pull out images that inspire me for an idea I haven’t even really developed much yet.
You can also find images other places—books, magazines, etc.
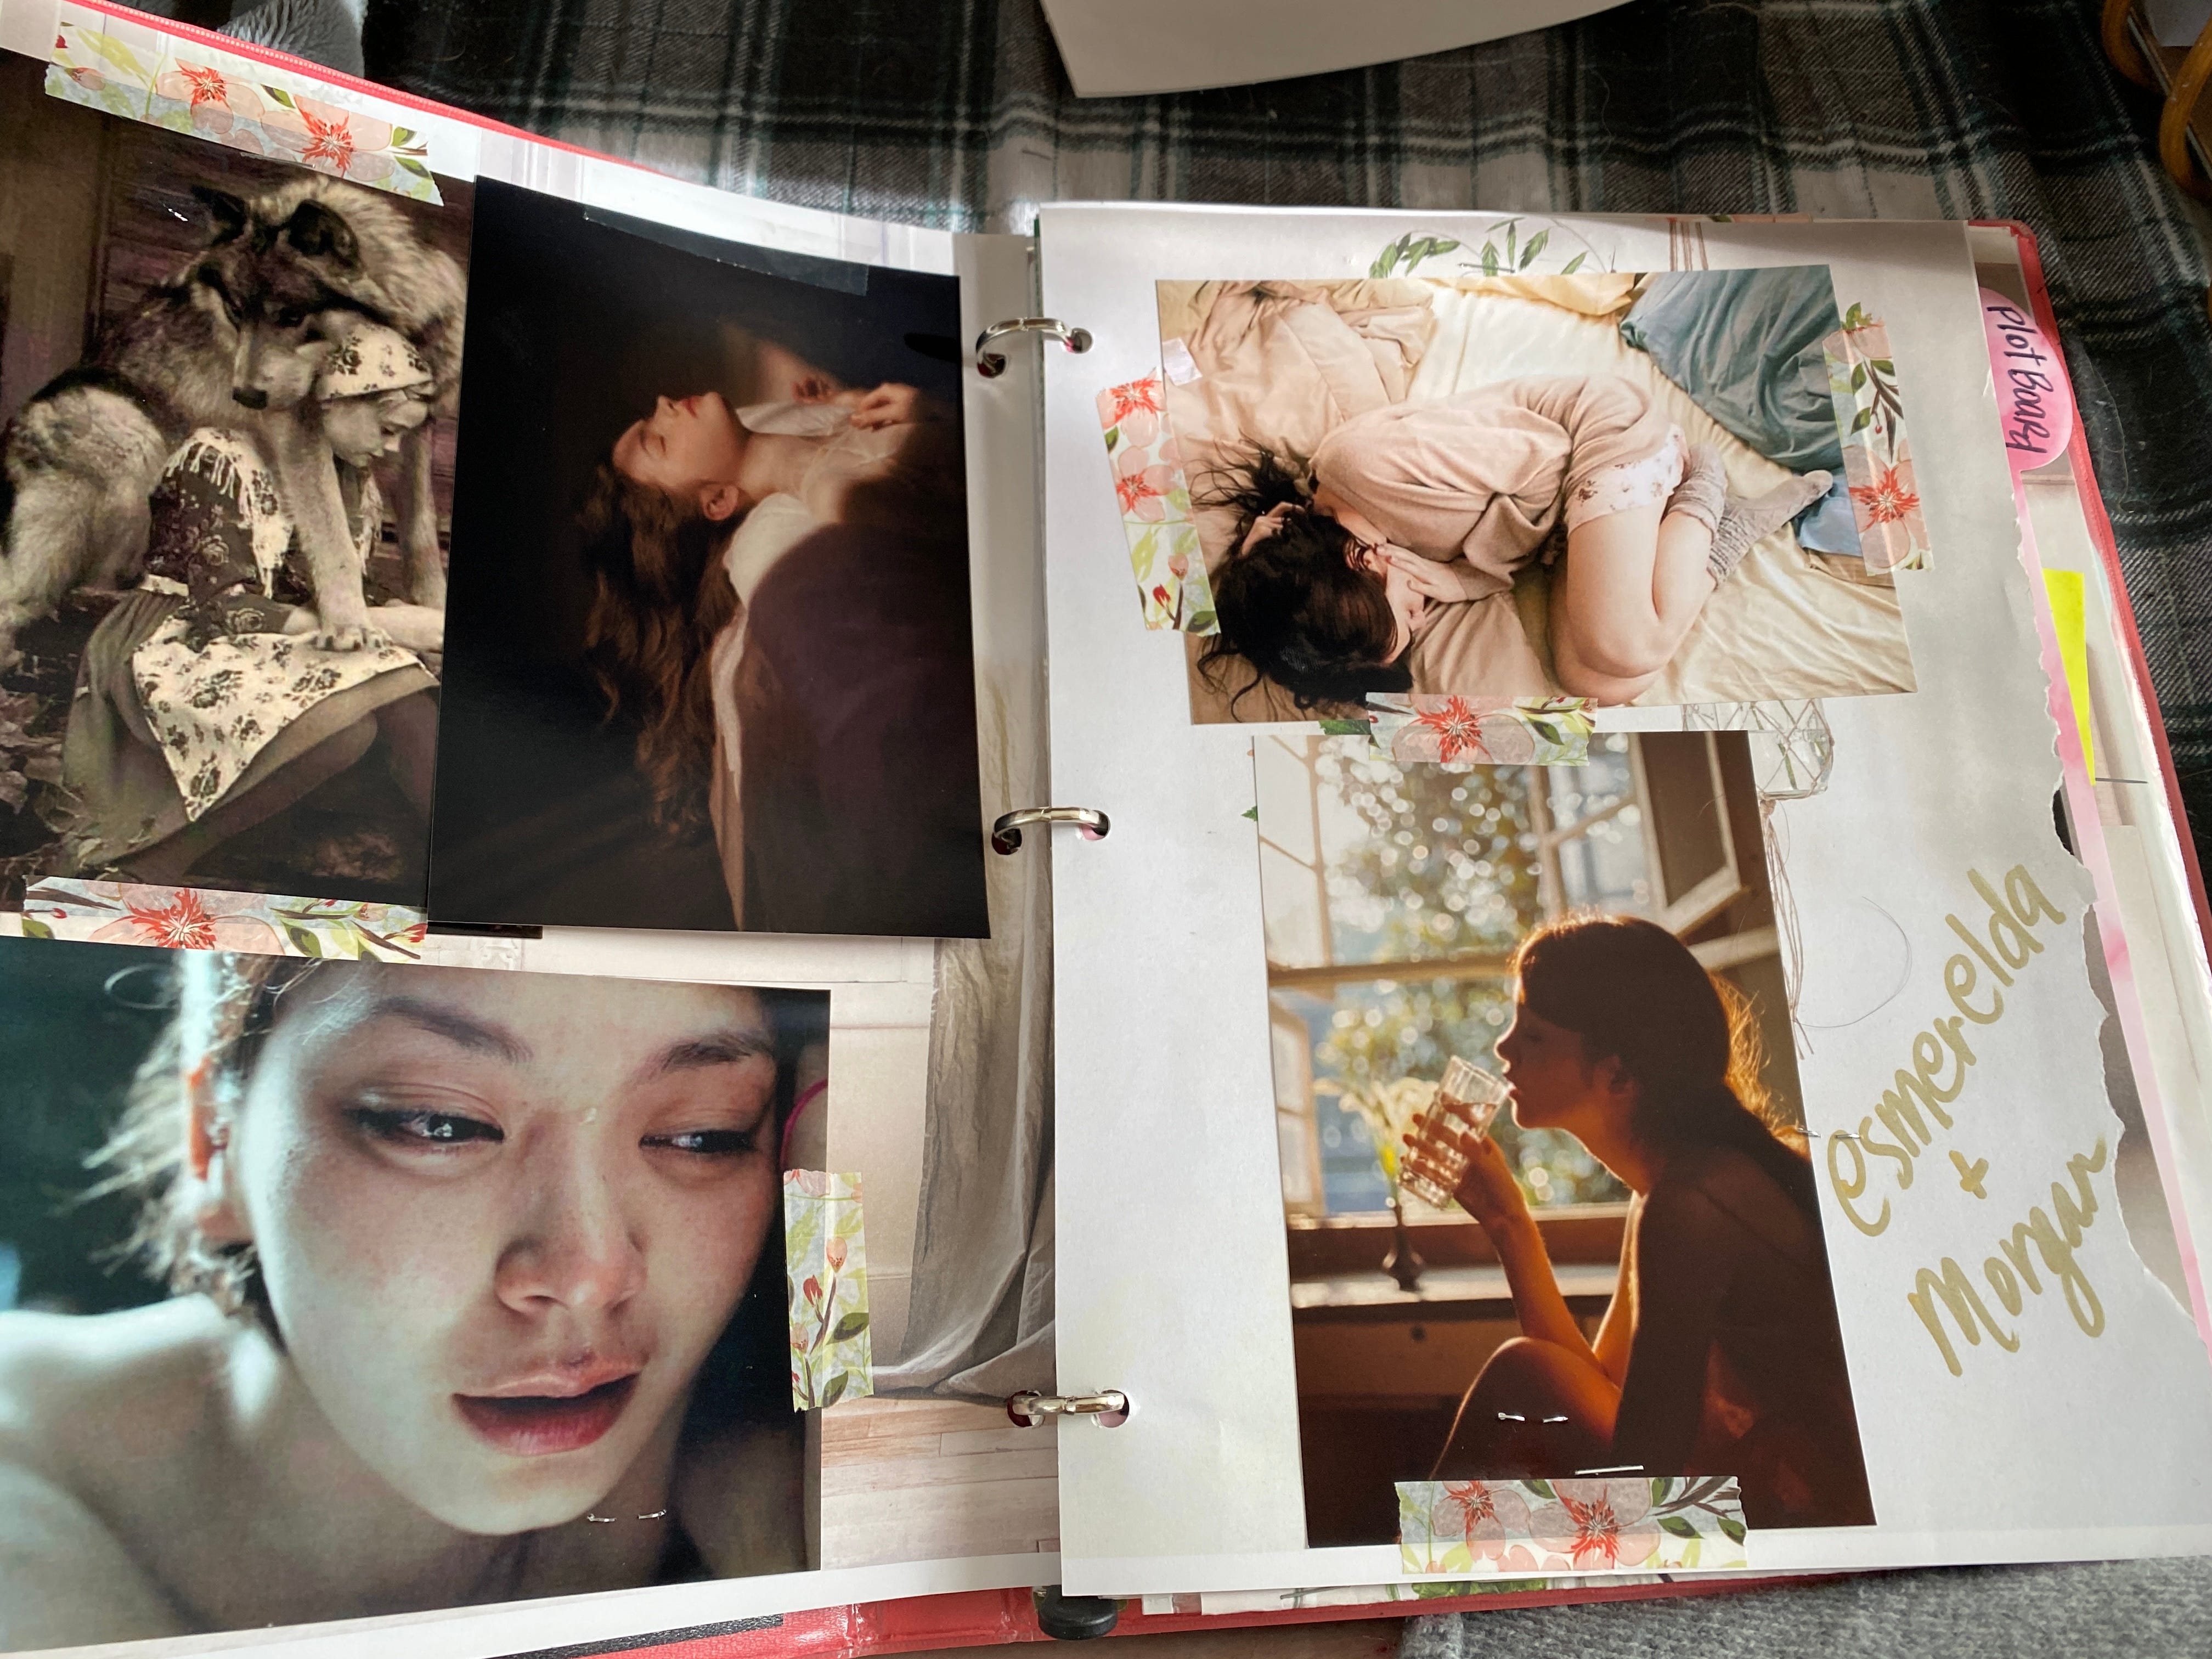
Adding Images to Your Book Binder
Once you have your images chosen and printed, it’s time to get them into your Book Binder.
I just organize them into characters, settings, and situations. Then I use washi or masking tape (so, low-tack tape that won’t damage the photo) to attach them to pages I put in the front of my binder. I also tape my favorites to the inside of the front cover.
Okay—that’s it. Tomorrow I’m going to send you a link to my Domestika class where I really introduce the Book Binder idea. It launches tomorrow and since it’s also Black Friday, it’ll be on a deep discount.
I’ve got a fun little bonus to tell you about tomorrow, too. So stay tuned!
Love,
Shaunta